This is a guest blog of our SainSmart x Makers series.
My name is Koen Zinnemers and I go by the name Captain Kaoss online.
I’m a Veteran of the Dutch Royal Army and I currently live off a military disability pension due to PTSD as a result of my time in Afghanistan in 2007 and 2010. I left the military in 2014 to pursue a college education and a career as a game artist but had to drop out in 2018 due to my ongoing battle with PTSD and everything that came with it. Shortly after I dropped out I discovered the fabulous world of FPV Drones and got hooked by the thrill of flight, the technology and the creativity that these amazing machines offer.
A Lifesaver Hobby for PTSD

For me and for many others FPV can feel like a form of therapy and a moment to disconnect from our daily struggles and just be free for that brief moment that we have the goggles on which makes this hobby a literal lifesaver for some of us.
Using 3D Printing for Building FPV Drone Parts
When I first got started with FPV Drones I quickly noticed the use of 3D printers to make accessories like Gopro mounts, antenna holders, landing pads and so on. But to me it seemed like a waste of resources. I had a brief encounter with 3D printing when I was in college and we used it to print high detail character models for a board game. compared to that everything just looked so boring and dull so I came up with the idea to combine my passion for game art with my new found passion for FPV.

I purchased my first 3D printer and started working on my first design for FPV, a cute little cyclops that would hold a standard FPV camera I called The Bug Eater. However, this is where the tricky part started. 3D printers have come a long way in the last 2 years and nowadays you can pick up an Ender 3 for cheap, slice, print and chances are you’ll have a decent print after a few hours. But I got started on a printer of which I won't even dare to mention the brand name because it caused a whole new episode of PTSD and of which I still have nightmares. So I made a cool design but couldn't print it in a decent quality no matter how hard I tried and after a few months of trying and getting semi decent results the printer literally melted and destroyed itself.
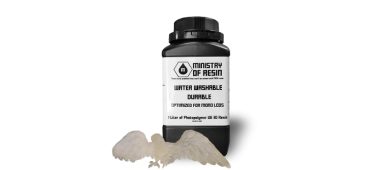
How to Improve TPU Print Quality

So I thought it would be a good idea to invest in a decent printer and got a Prusa mk3. Sure enough, printing PLA and PETG was blissful, and I was having a ton of fun… until I tried TPU…
TPU is a monster when it comes to printing complex shapes with overhangs and supports and no matter how hard I looked online I wasn't able to find any good guides to help me out since a lot of the information was old and nobody had attempted to print things similar to what I was trying with TPU.

This is where I started to experiment, faster, slower, hotter, colder, more retraction, less retraction, higher multiplier, lower multiplier and the list goes on. I spent nearly 6 months getting the printing quality to a point where I was happy with it and I was finally able to start bringing my creations to life.
So how is it done? I do not proclaim myself to be the all knowing god of TPU but here is a list of things you can try for yourself to see if it improves your printing quality.
1. Dry
No matter if it’s new out of the box or it has been sitting on a shelf for ages, pop that spool in the oven or food dehydrator at 50c for at least 6 hours. TPU is extremely hygroscopic meaning it will absorb moisture from thin air and having moist filament will cause clogs, blobs, zits and overall ugly surfaces. I highly recommend getting a cheap food dehydrator that will hold a spool or two or in my case ten.
2. Multiplier
If you want to get good results overall you’ll want to dial this in. print a single wall cube with no top or infill (or vase mode) and measure the wall thickness with a decent caliper or micrometer. If for example you measure 0.45mm but your slicer is set to print 0.4mm you can calculate the multiplier by dividing 0.4 with 0.45 giving a multiplier value of 0,88. This will ensure that the correct amount of filament is extruding from the hotend. Another method would be to measure the filament diameter over a length of a few meters and calculate the average and set that as your filament diameter in your slicer. Combining the two is even better.
3. Overhangs
TPU loves to curl up on steep overhangs when it cools too fast. So bringing down the fan speed or upping the temperature will improve those. If that’s still not enough, slow it down to 20 or 10 mm/s, your print will take longer but the results will be a lot better.
4. Stringing
Retraction, retraction, retraction and if you are not printing steep overhangs bring down the temperature as far as you can go without your extruder starting to skip steps and layers not bonding. Investing in a direct drive extruder would also be a good idea, although it is possible to tune a bowden drive printer to not string anymore, it is significantly harder to do so.
5. Supports

Support interfaces are the key for this. A support interface is basically a few layers on top of the regular support structure that is a lot denser and can be set to be printed as dense as a normal top layer. If you combine this with the correct Z distance between the interface and the model you will be able to peel it off with little effort and get beautiful clean results.
Now let’s talk about design.

In general, I do not adhere to the rules and tips that are usually followed when designing for 3D printing. Things like, no overhangs beyond 45degrees, avoid bridging, sharp corners and so on. I do believe printing your models in the correct orientation will make a difference but this is not something I keep in mind when designing my creations.
1. Preparation

When I’m designing I want to create shapes that will be easy to read and that most of us will understand. I try to find a balance between reality and fiction that makes the designs believable enough and try to reference things from reality or popular fiction. And because I design for 3D printing I tend to not go crazy on the details. My main weapon of choice Zbrush allows the user to create incredible detailed models all the way down to skin pores. However it would be a waste of time and effort simply because no FDM printer on the market can print such detail and going down to a smaller nozzle and finer layers would make for some ludicrous print times.
Usability is key when it comes to designing for FPV, looks come second for nearly every pilot. So before I start a design I plan what it should do and how I want it to function. If it’s a Gopro holder I want to have easy access to the buttons and I want to be able to remove the camera without too much effort while making sure it won't eject in a crash. When I design an antenna holder it’s important that the antenna is secure and sticks out far enough and is in the right orientation to ensure range and so on. I always start with a crude mockup in 3D, placing all the components where I want them to be. In addition, rough shapes are placed that serve as access points and placeholders for screws and other additional hardware.
2. Sculpture

Once all this preparation is done I can start sculpting, if I’m not sure what I want to design or have trouble envisioning what I have in mind, I take a screenshot of the mockup and just draw over it. This gives me a quick and easy way to come up with ideas and to iterate without spending hours on a sculpture. Once I have my basic sketch I slowly start to refine the shapes and with that slowly upping the resolution in which I'm sculpting making sure I save the fine details for last. When it comes to 3D modeling it’s important to keep rotating the model, what looks good from one angle might look horrible from another.
3. Slicing

After I’m done with my sculpt it’s time to bring it into the slicer. Here I look for the ideal orientation to print the model in to ensure strength while also trying to orientate the model in a way the details can be printed in the most ideal way without using too many supports. After that I do a test slice and scroll through the layers, looking for walls that might be too thick or thin and other defects. If it looks good I can run a print, so I can properly test the prototype and see if it works as intended. I rarely get it right the first try and there are always changes to be made, so I do a lot of back and forth between Zbrush and 3D printing to make sure I’m satisfied with my creation.
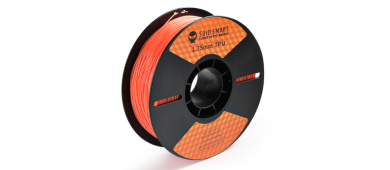
4. Color (We’ve got Kaoss Purple now!)

After that it’s all about color for me. Especially now that I use a multi material setup it’s extremely important to me that everything has the right color and combination.

You can imagine my excitement when I found myself in need of a specific shade of purple and SainSmart agreed to give it a shot, sending me a preproduction spool a few weeks later and absolutely nailing the color (The Kaoss Purple Filament is available now). I look forward to continuing this path with them, finding more colors and perhaps even other means to enable my creativity and that of the FPV community. I’m not alone when it comes to customizing my drones. Many choose to make their Quadcopters stand out by adding vibrant colored 3D prints, painting and even designing their own frames. I’m happy that since I started to go down this path to create unique 3D models for FPV that others have followed and that I was able to inspire others to create.

To me that is what making is all about. Inspire others, share our knowledge and educate each other to create amazing projects. I’ll gladly spend time chatting with other makers sharing my knowledge and absorbing theirs. Guiding people who are new to 3D printing to get the best results out of their printer.