Written by Graham
Disclaimer and Notes
Sorry but this needs to be said and will be repeated later!
I accept no responsibility for any bit dimensions, speeds, and feeds stated which may cause any problems whatsoever!
Any Speeds and feeds are associated not only with a bit but it’s used on a specific router. Currently only for a 3018 Pro or Prover (Or similar) with the standard 775 motors.
The speeds and feeds are also for the material being used and the operation performed
The following categories are currently included:
- Softwood – Roughing
- Softwood – Finishing
- Hardwood – Roughing
- Hardwood – Finishing
- Acrylic – Finishing
Where Roughing tries to remove as much material as practical without regard to the finish and Finishing takes a slower approach to leave a good finish, (finishing would include engraving and V carving operations)
Softwood, Hardwood, and Acrylic are all generic terms, there are many different types of softwood (~650) with varying hardness, hardwoods have even more variation in hardness, and just don’t get me started on Acrylic or soft metals! How a wood has been harvested, dried, stored and the way it has been cut can also have a significant effect…
So please take any suggestions for Speeds and feeds only as a guide, start with conservative settings, low speeds, and depth of cut, and see what speeds and feeds work best for your specific piece of wood or acrylic.
The Basics
How does a router bit work? Well, it has sharp cutty bits mounted on a shaft which when rotated and pushed into the stock cuts chunks out of it which are carried away by the spaces on the sides of the bit leaving a hole or groove the same shape as the bit! Pretty obvious but all true! Please read on, this does get a little more interesting!
Operations
There are a lot of things you can do with a bit in a router, these are the more common ones. Often to complete a piece more than one type of operation is used. Some bits are better suited to some operations than others, a small V bit can be used in a roughing operation but it’s going to take a long, long time!
Roughing
Removing as much material as possible, as fast as possible, without being concerned about the surface finish left. Roughing should always leave a little material at all edges of the cut so that a finishing bit can remove it on a second cut leaving a good finish and surface detail behind.
Finishing
Leave as good of a surface finish as possible along with as much detail as possible. Can be used after a roughing operation has removed most of the stock or by itself for a shallow cut.
Engraving
Scratching the surface, making shallow, detailed cuts, often V shaped, these can be deeper using larger V shaped bits.
Surfacing
Removing an uneven surface from the stock to leave a clean flat and level surface.
Drilling
Making holes, this can use drills, or for larger diameter holes a straight sided bit can be used to cut out the hole.
Common shapes of bits
Bits come in a bewildering variety of shapes and sizes and an even greater variety of names and descriptions, often there is more than one name for basically the same thing. This covers the more common shapes or types of bits used on hobby routers. Your CAM software will have names and definitions for the types of bits it knows how to use. These vary between CAM software suppliers.
I am only describing the shape of the cutting surfaces and so the shape they will carve out of the stock. Each of these can have lots of variances but the basics remain the same. The usage is what they are best suited for.
V (AKA V Groove, Chamfer Mill, Engraving)It will cut a V-shaped groove into the stock the angle of the V is normally referred to as the angle between each side of the groove. You may see a tip radius or diameter specified; this would be a small flat spot at the tip of the bit. Used for: Engraving, Finishing. |
 |
End Mill (AKA Flat End Mill, Straight Mill, Slot Drill)Basically a straight rod, it will leave a flat-bottomed square groove as it cuts. Lots of variations in the shape of the cutting edges such as fishtail which describes the shape of the bottom face. Used for: Roughing, Finishing, Drilling, and Surfacing. |
 |
Ball End (AKA Radiused Slot Drill, Ball Nose, Lollipop)A round-ended bit where the circular cutting edges extend past the vertical. Some software doesn’t allow this so the closest specification would be a Ball Nose which is mostly close enough. Used for: Engraving, Finishing. |
 |
Ball Nose (AKA Round Nose)An end mill with a hemispherical end. OK an end mill with half a ball stuck on the end. Often used with a tapered shaft, see below. Used for: Engraving, Finishing. |
 |
Bull Nose (AKA Radiused End Mill)An end mill with a cutting edge radiused at the edges. Used for: Roughing, Finishing. |
 |
TaperedWhere the edges of the bit are tapered, not vertical. This will have a shape on the tip such as a ball or bull nose.... The advantage of a tapered bit is that they tend to be more robust, but they are not going to cut a vertically edged pocket. Used for: Finishing. |
 |
Surfacing Mill (AKA Face Mill)Really these are just big end mills, the cutting edges are designed to leave a flat surface and the larger diameter reduces the ridges which can be left by a smaller diameter bit. Used for: Surfacing, Roughing, Finishing. |
 |
OthersLots of these exist for many reasons, but especially when starting out you are unlikely to need a Radiused Square End 23° Shallow Ogee bit. |
You might have noticed the beginnings of potential confusion already. Well, hopefully not confusion but a blurring of the boundaries. For example, what is the difference between a V Bit and a tapered mill with a very small tip diameter? or an end mill and a surfacing mill...
Different software uses different terms to define the same thing, some have more detail in the descriptions, and some just ignore things as being irrelevant to how they create a toolpath. Fusion 360 has the most comprehensive bit descriptions of all the CAM software I use. A Flat end mill in Fusion 360 has 9 parameters to define the bit plus parameters to define the shaft shape and a separate definition for a Face Mill. Carveco Maker uses 1 parameter, the bit diameter. Which is better? The simple answer is neither, both use the dimensions they need to calculate the tool paths they can generate.
Tool holder and collet
Not strictly part of the bit but very important. The tool holder is fitted to the end of the spindle motor, this uses a collet that takes a bit of the correct shank diameter and as it is tightened compresses the collet into the tapered holder to secure the bit.
The ‘standard’ tool holder for small routers is an ER11-A, ER is the ‘name’ 11 means that it has an 11 mm diameter at the bottom of the taper in a holder A defines the Nut – Diameter, and thread…

Collet
The Collet fits around the shank of the bit and slides into the tapered interior of the holder. Near the bottom is a groove that fits into the clamping nut, this allows the collet to be pulled out of the holder to release it as the clamping nut is unscrewed. The slots cut through the collet allow the segments to be forced inwards around the bit as it is tightened into the holder.
ER11 Collets are described by the internal diameter. A 3mm collet is designed for a bit with a 3mm shank diameter. There is a little tolerance built in due to the clamping action. Depending on the bits you use to get the collets to fit them, if you frequently use 6mm bits then get a 6mm collet, if you often use 1/4” bits get a 1/4” collet, if you use both, get both.
Collets are also available in sets which can be cheaper and very useful if you also use drills. https://www.sainsmart.com/products/genmitsu-15pcs-er11-precision-spring-collet-set

Removing a collet
First, remove any bit and unscrew the clamping nut completely from the holder. The collet now needs to be popped out of the retaining ring by pressing the collet over to the side (1) and then applying a push to pop it out (2).
It will be easiest to push out when you are lifting the collet slot over the narrowest point of the retaining ring on the nut as shown by the orange circle. As you cannot see where this is if it doesn’t pop out on the first attempt rotate it a bit and try again.

Inserting a new colle
Before inserting a new collet make sure;
- The inside of the tool holder is clean and free from dust and debris.
- The collet itself is clean, on the outside of the tapers, in the spaces between the collet segments, and in the bore which will take the bit.
- The nut is clean and free from debris around the retaining ring and on the bottom taper.
- Do not insert a collet into the nut with a bit inserted! This will make it nearly impossible to seat the collet into the nut correctly.

Locate the widest point of the retaining ring in the nut and engage the slot of the collet into it, while pushing it into the nut (1) press it straight (2) it will ‘clip’ in. After insertion check that the collet is straight and is fully seated into the nut.
The left photo shows a correct alignment with the collet aligned with the nut and the bottom taper sitting on the corresponding part of the nut. On the right the collet is not aligned with the nut, the bottom taper is resting on the retaining ring rather than it is in the slot of the collet. When tightened from this position the collet will be forced out of alignment and damage to the nut, collet, and tool holder could result.


For ease of use, I have purchased an ER-11A clamping nut for each collet. This means I can just leave the collet permanently in the nut. https://www.sainsmart.com/products/genmitsu-4pcs-er11-a-collet-clamping-nut


Inserting a bit
- Make sure the nut is slack on the tool holder.
- Make sure the shank of the bit is clean.
- Slide the shank into the collet, the maximum depth of the bit the collet will clamp is ~18mm (some collets may have a shorter clamping distance). There is a gap between the top of the collet in the tool holder so a bit can be inserted further if required.
- Using the spanners firmly tighten the nut onto the holder, compressing the collet around the bit. This does need to be tight.
Checking everything
After mounting a bit, especially after changing the collet, manually rotate it and ensure the rotation of the tip of the bit is straight and true.
If it is not check:
- The collet is seated correctly in the nut.
- A dirty bit shank or collet interior is not throwing things out of true
- The tool holder taper and collet exterior are clean
- The collet is the correct size for the bit shank
- The collet has been tightened enough and holds the bit securely
- The bit is not bent or damaged.

To be continued Part 2 for Bit Dimensions and definitions
Check out Genmitsu milling bit data base


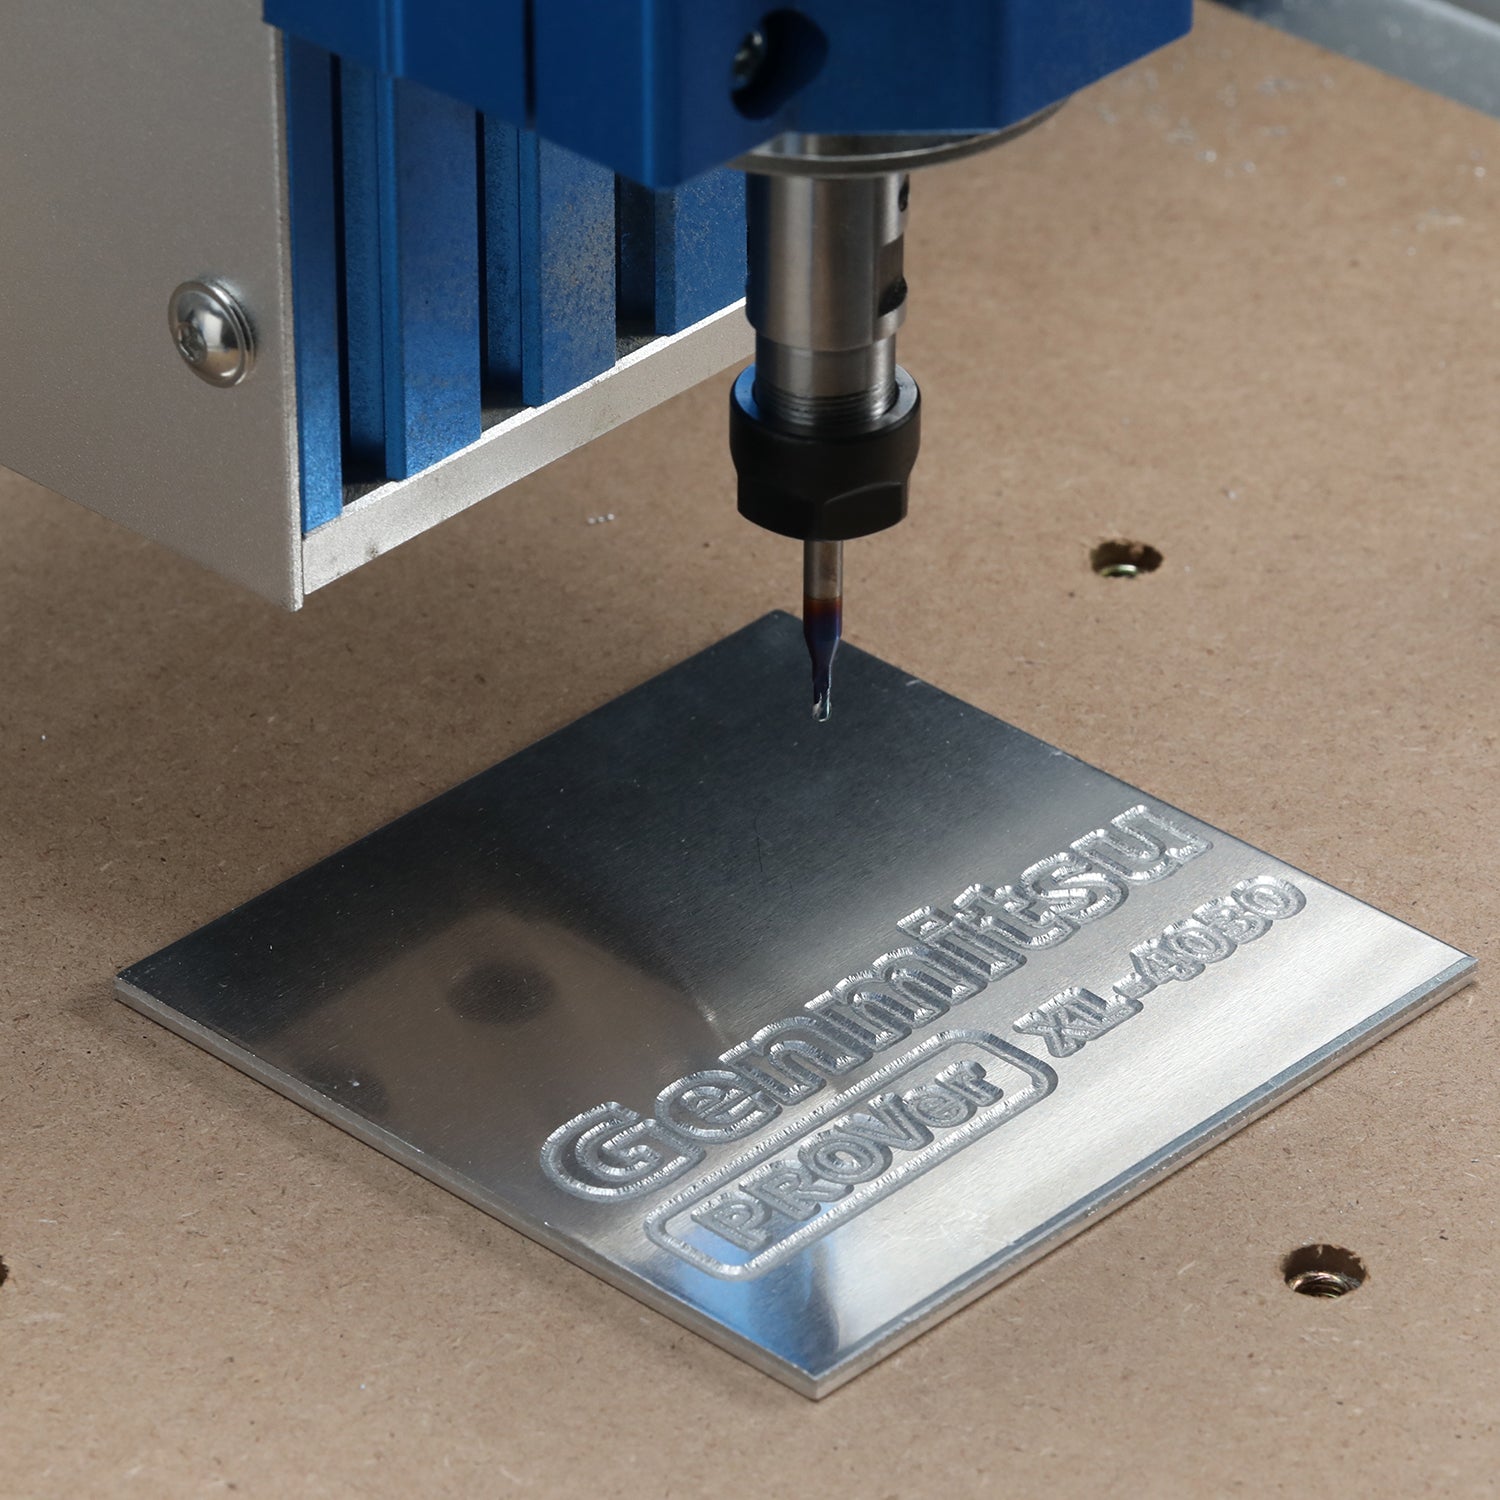

Please note a flat ended milling cutter does not cut to centre, so plunging down the axis is dangerous. A slot drill as the name suggests does to cut to centre, thus allowing safe vertical cuts similar to a drill.