Written by Leo Wrobel (a member of SainSmart Genmitsu CNC User Group)
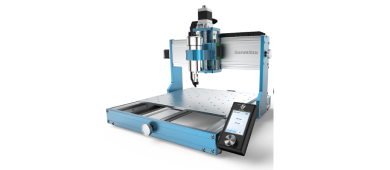
This year I have found my new favorite hobby after purchasing the Sainsmart 3018-Prover and laser engraver. I started joining the various groups on social media for advice, to see what other people have been making, and also to share my own projects. This landed me an offer to try out the new Jinsoku LE-1620 Laser Engraver. Of course, when asked if interested in trying out the new machine I jumped at the opportunity. The following are my thoughts after a week of use.
Setup:
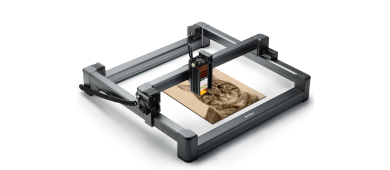
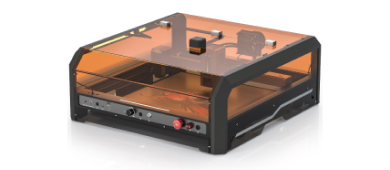
The Jinsoku LE-1620 by far was the easiest setup I have ever had on a machine to date. It was 6 screws total and plugging in the X-Axis motor. From opening the box to having it assembled took about 5min (conservatively)…..seriously.
First Impression:
The machine is light, is easy to move around, and just looks nice. I do really like the ease of setting the laser height with the 20mm cylinder that is included and the knob on the laser carriage. The play is a bit spongier compared to my 3018-Prover, but it is not something that is a big deal to me personally. The holder on the Prover is definitely more rigid, but it has to withstand routing so I get it. I also like the button to turn the beam on and off, which really is convenient compared to turning it on and off using my laptop.
First Run:
I was very excited to get into it and caused myself a few problems right out the gate. The origin is not in the same spot as my other machine so when I started Lightburn I was running in the wrong direction. There is, however, a large yellow sticker on the black frame that really jumps out showing where the origin is located, so after realizing my mistake it was go time. I decided to do a quick job on Lightburn on one of the test squares of MDF provided with the machine, and it went great. I was and still am blown away at how quiet the machine is. It is scary quiet. My job finished with no issue and can be seen below.

I ran 1000mm/min at 25% power for the QR Code and 1000mm/min at 50% power for the words just for comparison on MDF. Although 50% power was too high, I was happy with how it turned out.
Further Testing:
I went from there to testing some painted tiles using the Norton White Tile Method, (worth checking out). First, I ran a basic power test on Light Burn to get a baseline of speed and power seen below.

I decided that 600mm/min at 50% was probably the fullest and darkest black, so I used that to do a photo on the tile. This was my first attempt.

It wasn’t bad for a first attempt, so I ran a detailed power vs speed test. After getting a better understanding of keeping detail I ran two more jobs seen below this time using Lasergrbl. While I need to improve my preprocessing of images, I was very happy with the outcome and blown away with the detail this machine is able to achieve.


Using the same method as the tiles I was also able to etch a glass bottle, which I have never tried before because in order to get extra height on my Prover I have to remove the bed, and then have to play around with getting enough height to reach the laser. The Jinsoku makes it very easy to get extra height with no issue due to the design.
Final Thoughts:
I love the Jinsoku LE-1620. It was easy to put together, easy to run, and I am excited to see the full potential as I play with it and learn new techniques. It is definitely my go-to machine now for engravings.