
UPDATED
What You Will Need
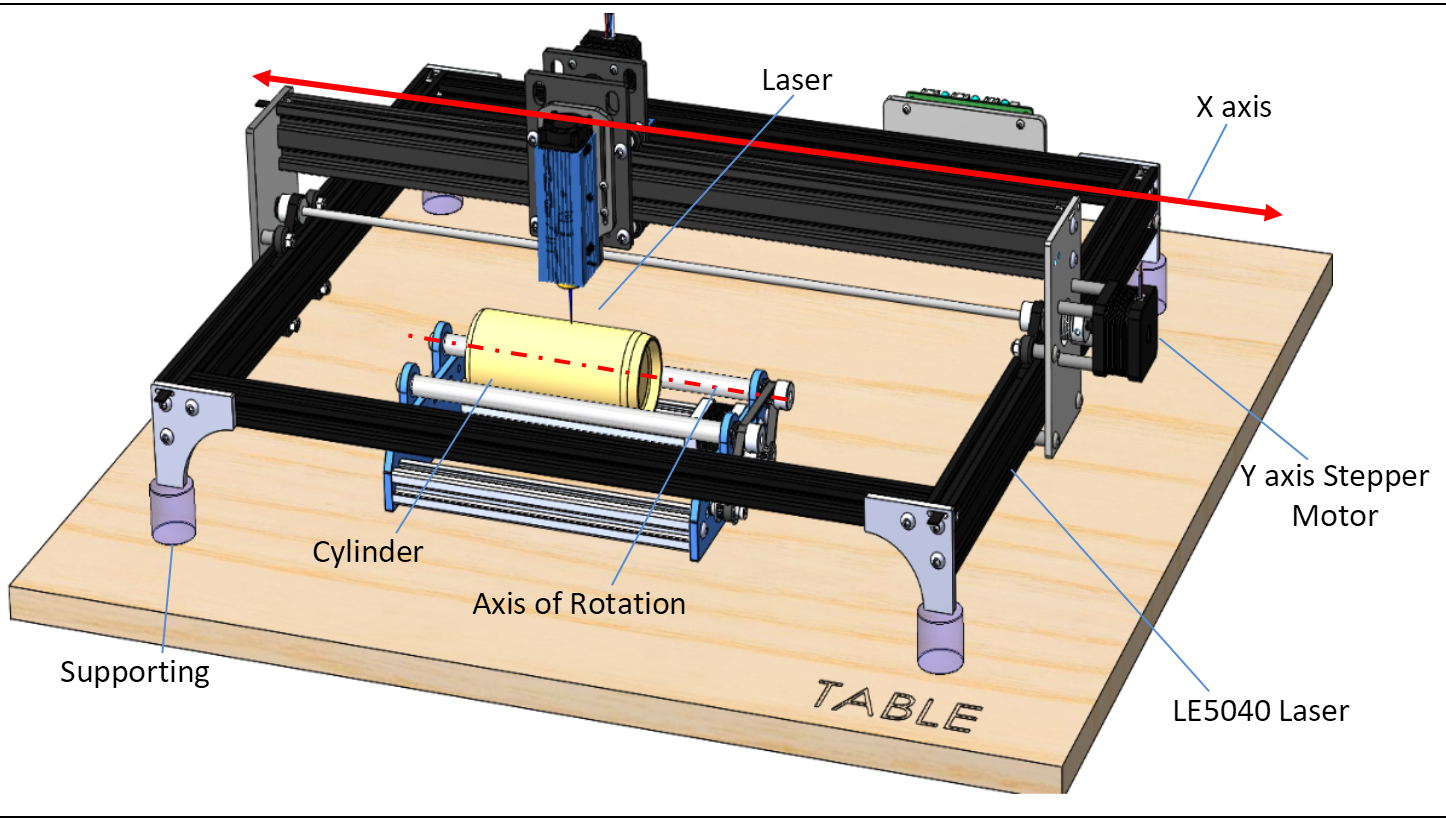
- Genmitsu LE5040 CNC Laser Engraver Machine
- Genmitsu LE5040 Laser Rotary Roller
- LaserGRBL
- Cylindrical Stock Material
Before You Start
-
This guide builds on the foundation established in the
LE5040 Quick Start Guide with LaserGRBL.
It is recommended to review that guide first.
- Section 3 regarding custom buttons is particularly important, so ensure you download and install those buttons into LaserGRBL.
- Also, follow all instructions on installing and positioning your rotary axis.
Step 1: Add Another Custom Button
To simplify using the rotary axis, another custom button has been created for LaserGRBL. You can download it from this link. The button will function as described below:
Toggle Rotary Mode
This button modifies two firmware parameters:
- $101 is set to 84 as per the user manual for the rotary axis. Clicking the button again will revert it to 80.
- $121 is set to 750 due to the acceleration value of 2000. High acceleration can cause the stock material to shift, ruining the engraving. Clicking again reverts it to 2000.
Step 2: Orienting Your Project in LaserGRBL
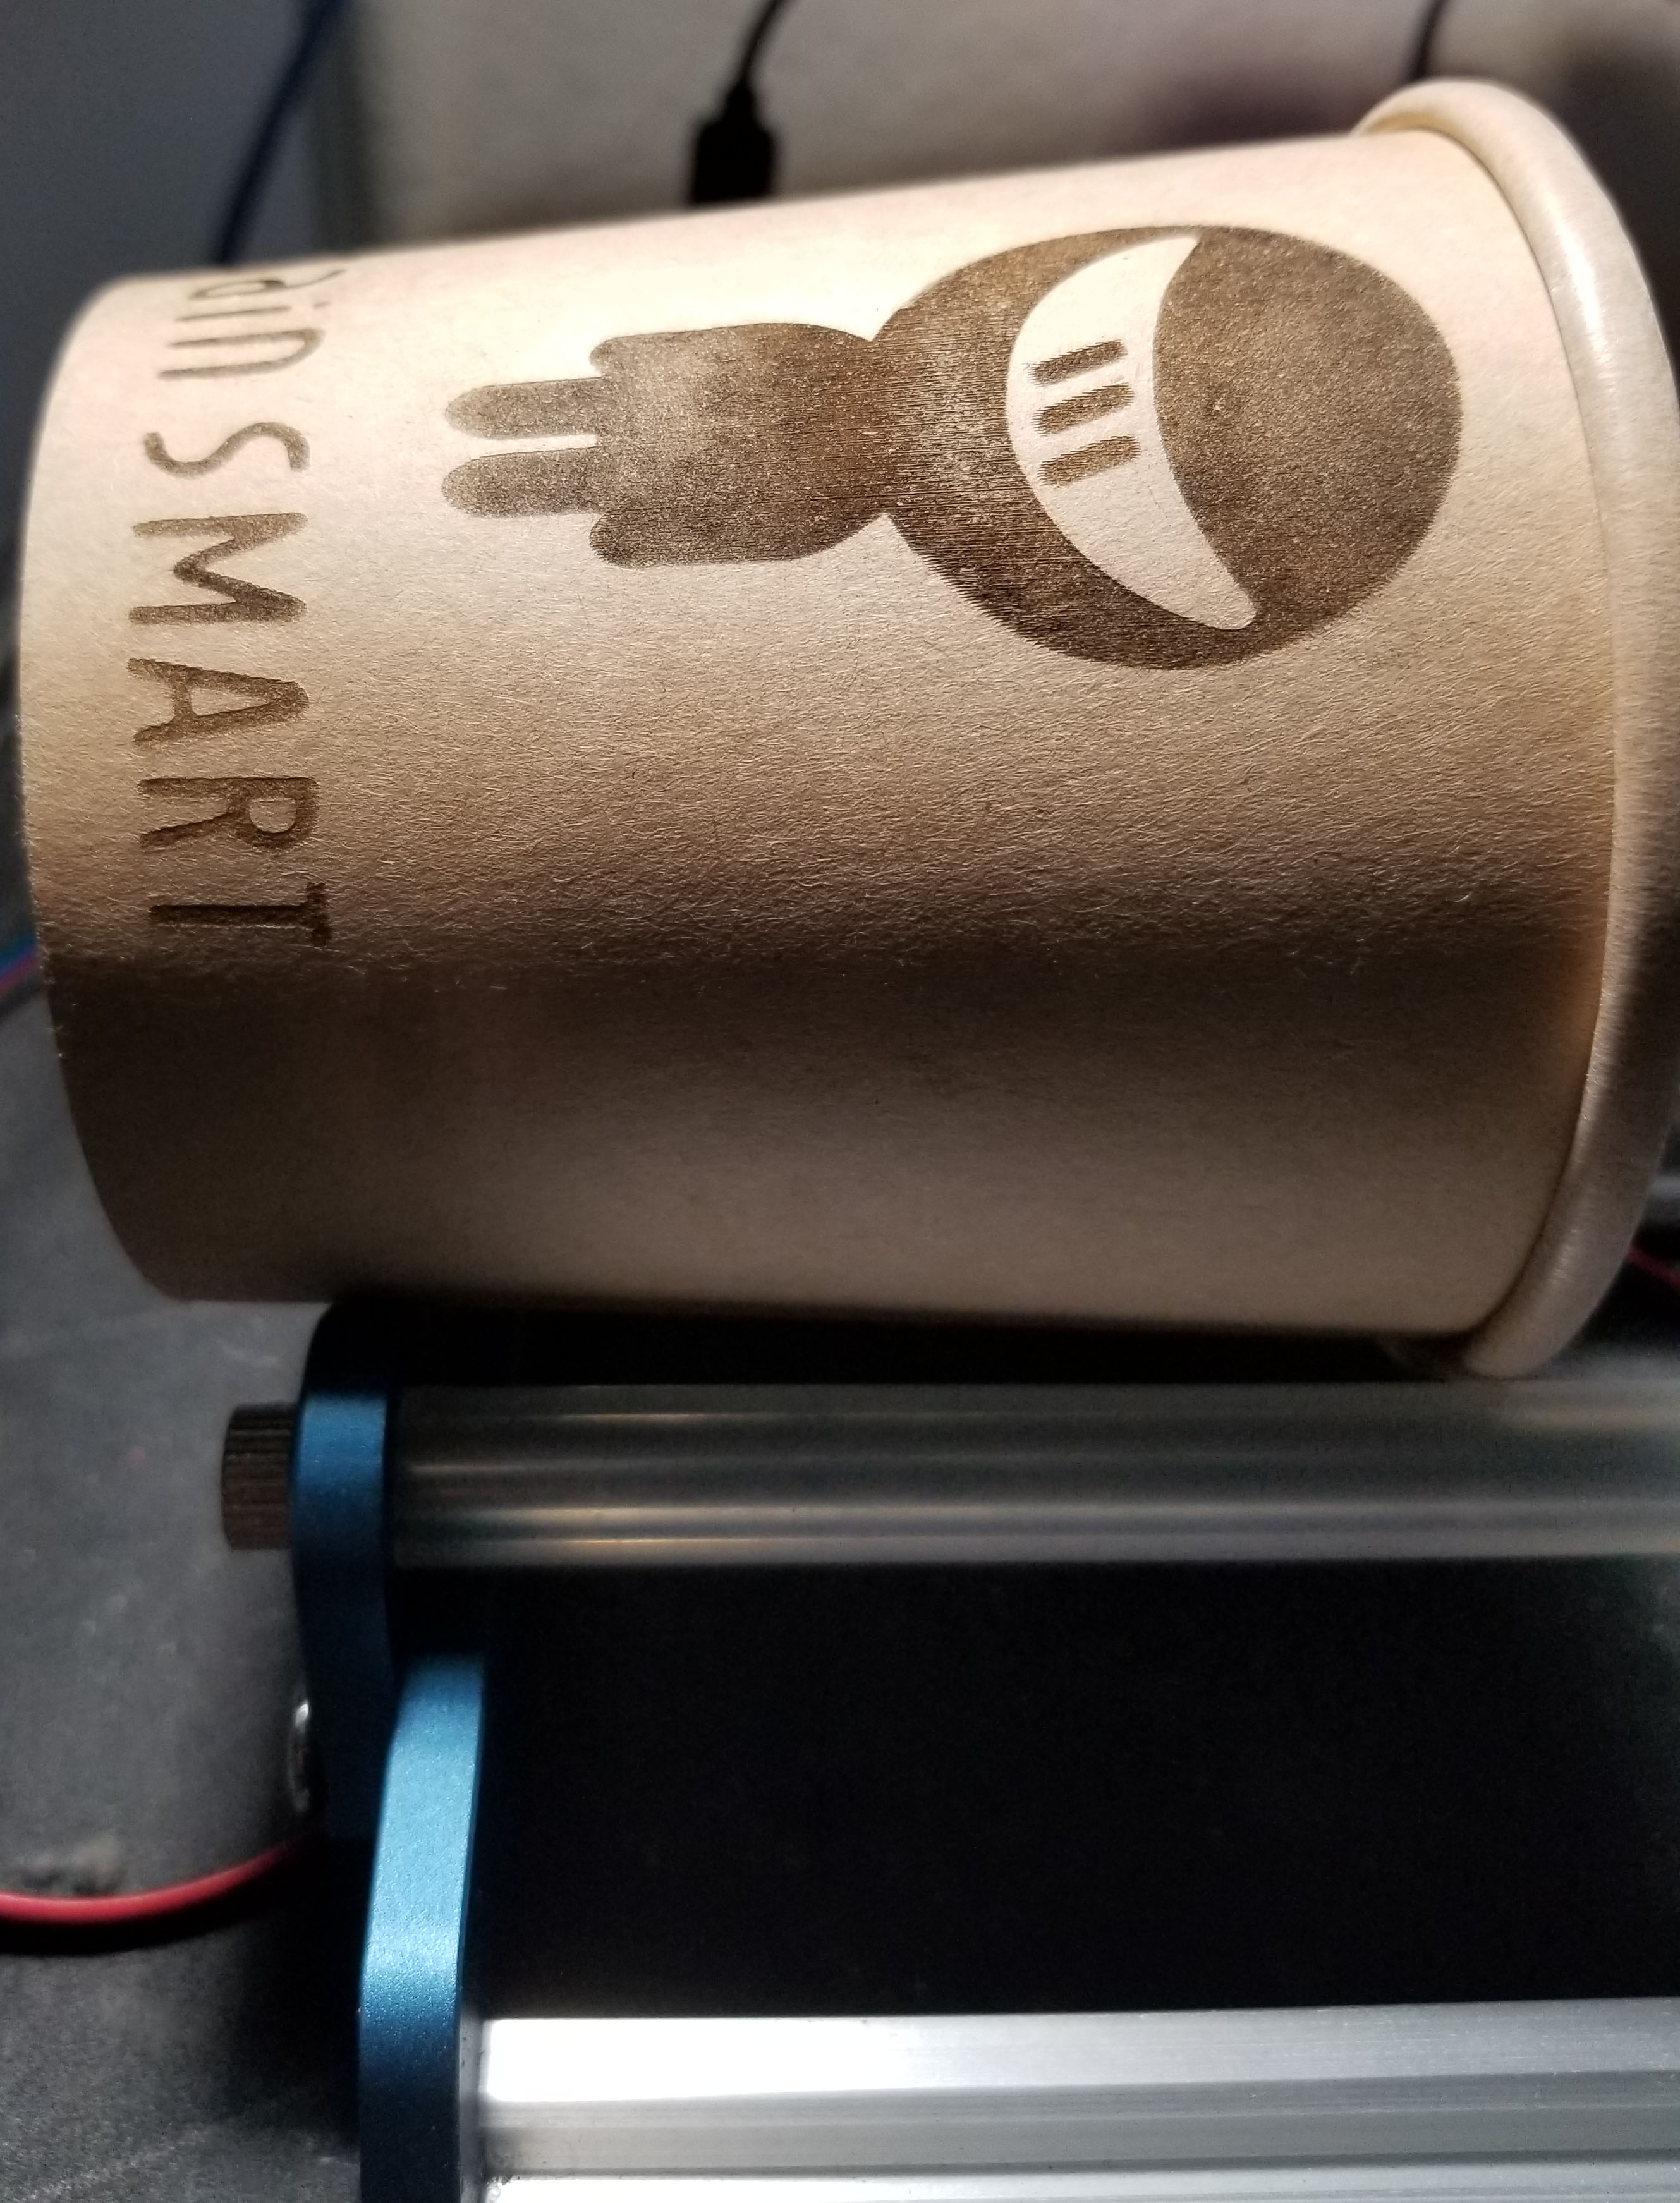
When you import your image for engraving, rotate it to the desired orientation. Your setup should resemble the image below with the stepper motor, belt, and pulleys on the right:
From this perspective, right is the top and left is the bottom. If you flip the rotary axis, remember to reverse the orientation in LaserGRBL.
The engraving has been rotated clockwise by 90 degrees for proper orientation. The final result can be seen below:
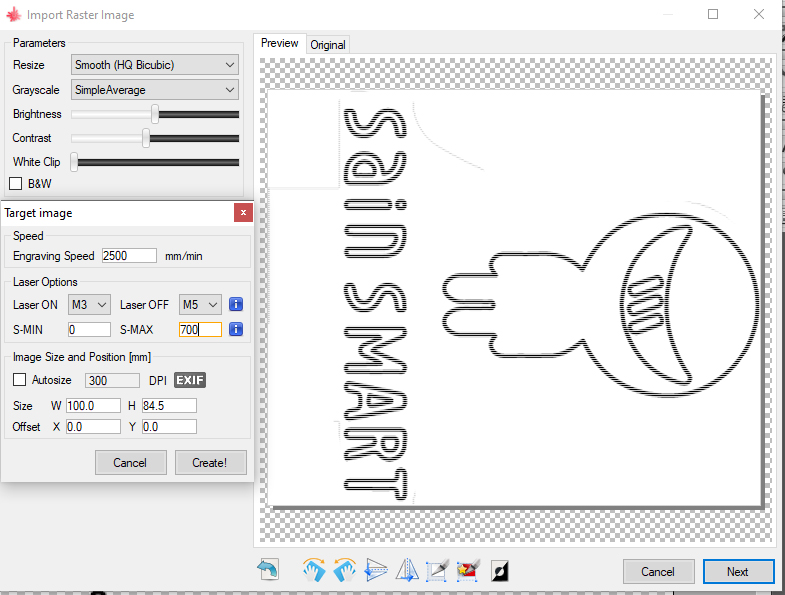
Step 3: Sizing Your Engraving
After selecting "Next" on the Import Raster Image page, a new window called "Target Image" will appear. This window establishes:
- The engraving speed (between 0 and 5000)
- The engraving power (between 0 and 1000)
- The size of your engraving.
Focus on sizing, as this is your only chance to adjust it. Measure the cup's length and adjust accordingly. Be cautious, as an engraving can roll up into itself if the width exceeds the circumference of your cylindrical stock material.
Step 5: Placing Your Engraving
In LaserGRBL, the bottom-left corner is the starting point for the laser. Ensure the laser is positioned correctly, then click the globe button:

This will zero everything out, ensuring your project engraves as expected. Use the "Frame Project" custom button to trace the project perimeter while the laser fires at 0.5%.
After confirming the placement, double-check that your laser is focused and start engraving!


1 comment
SKU: 101-63-LRR Rotary Roller – I have a redesign suggestion. If the rollers were made with an increased diameter to clear the supports it would eliminate the limit on the short length of the item that could be engraved. You might also think about developing an upgrade item to go over existing machine rollers or offer replacement rollers to eliminate the restriction.