First Impressions
• It is really well packed and protected, the packaging is specifically designed and created for this router.
• The assembly instructions are good.
• The quality of the parts seems very good.
• It’s mainly pre-assembled so assembly is quick and easy.
• There are the normal setup and checks to make for any Router.
• It’s heavy, very solid, much beefier than the PRO and PROVer, more powerful spindle and steppers…… Not surprising as it is intended to be capable of cutting metals.
• No ‘scientific’ tests but the spindle does not distort easily even with considerable pressure on the end the deflection is not measurable by me.
• It is obvious that people have sat down and designed this carefully.
I also like the improvement in the sample/test files, they now include an image of what it should look like and details of the bit, speeds, feeds, cut, and estimated time. Much better than previous sample files.
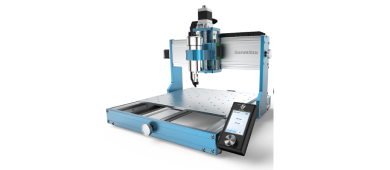
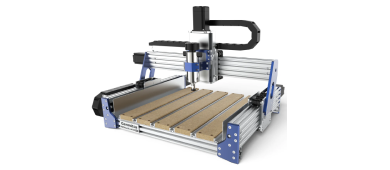
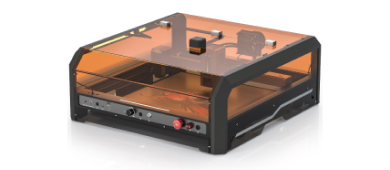
Construction
Solid Aluminium construction throughout. Apart from things like the switch covers, Mainboard and wire coverings I don’t think there is a bit of plastic in the machine, certainly not in the frame, bed and gantry!
• Bigger extrusions, more bolts wider rail spacings for greater torsional rigidity
• 2 Linear rails on the X-axis mounted on fixed 20x20 extrusions
• Z-Axis guide rods wider
• Y-axis guide rods Wider and larger.
• Fully metal, one-piece, motor mount to take a 52mm motor.
• Z-axis travel greatly increased
• Bigger stepper motors
• Improved Anti-backlash fittings
• More bolts used for extra rigidity.
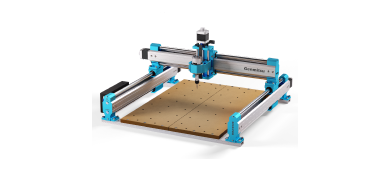
Bed
A larger (30cm x 20cm) solid Aluminium bed for greater strength and rigidity, not an extrusion, with predrilled and tapped holes to take the clamps. The bolt that would normally take the T nut on a slotted bed just screws into the hole. The bed supports are also now all metal.
Motor
A 300W 48Volt air cooled 52mm spindle motor, the standard 24V 775 motors on the 3018’s are~75W, so a significant upgrade. Lots more RPM and more importantly lots more power and torque. The spindle has an ER11 collet pre-attached so the bits and collets from any SainSmart 3018 are compatible.
MainBoard
Upgraded to handle the 48V supply, larger motor and the larger stepper motors. The motor RPMs are controlled via Grbl commands, not a potentiometer for flexibility.
All the normal inputs and outputs are provided, but with connections for 2 Y-axis stepper motors. Are upgrades in the future???
The cooling fan on the mainboard is either silent or only on when needed which removes what can be annoying background noise. But it does make it difficult to tell if the router is turned on!
Power Supply
Definitely beefier than the PRO and PROVer, 48Volt at 7.3 Amps which means it delivers 350Watts as
opposed to the 120W PRO or PROVer supplies. The Supply is manually switchable between 110 and
220V, make sure you select the correct input voltage! And has its own cooling fan, again thermostatic
so it’s silent unless needed.
Bells and whistles
• All tools, spanners, cleaning brush, clamps… are included.
• 4 limit switches, sufficient for homing and use.
• Emergency stop switch – very useful when needed!
• Z-Probe.
• USB Disk with sample projects, manuals….
• Mounting bracket for the ‘standard’ 33mm square Laser heads is included.
• Hand adjustment knobs for all the axes.
• Offline controller with SD card included.
• USB Cable with ferrite noise suppressor.
How does it work?
While the proof of the pudding is in the eating (an old Yorkshire saying! When I was a young man I misunderstood the meaning of this saying due to my Mothers Christmas Cake and Christmas Pudding recipes. Both involved large quantities of Brandy as an ingredient!) at first impression, it is stronger, more robust, more powerful
and more rigid than the PROVer.
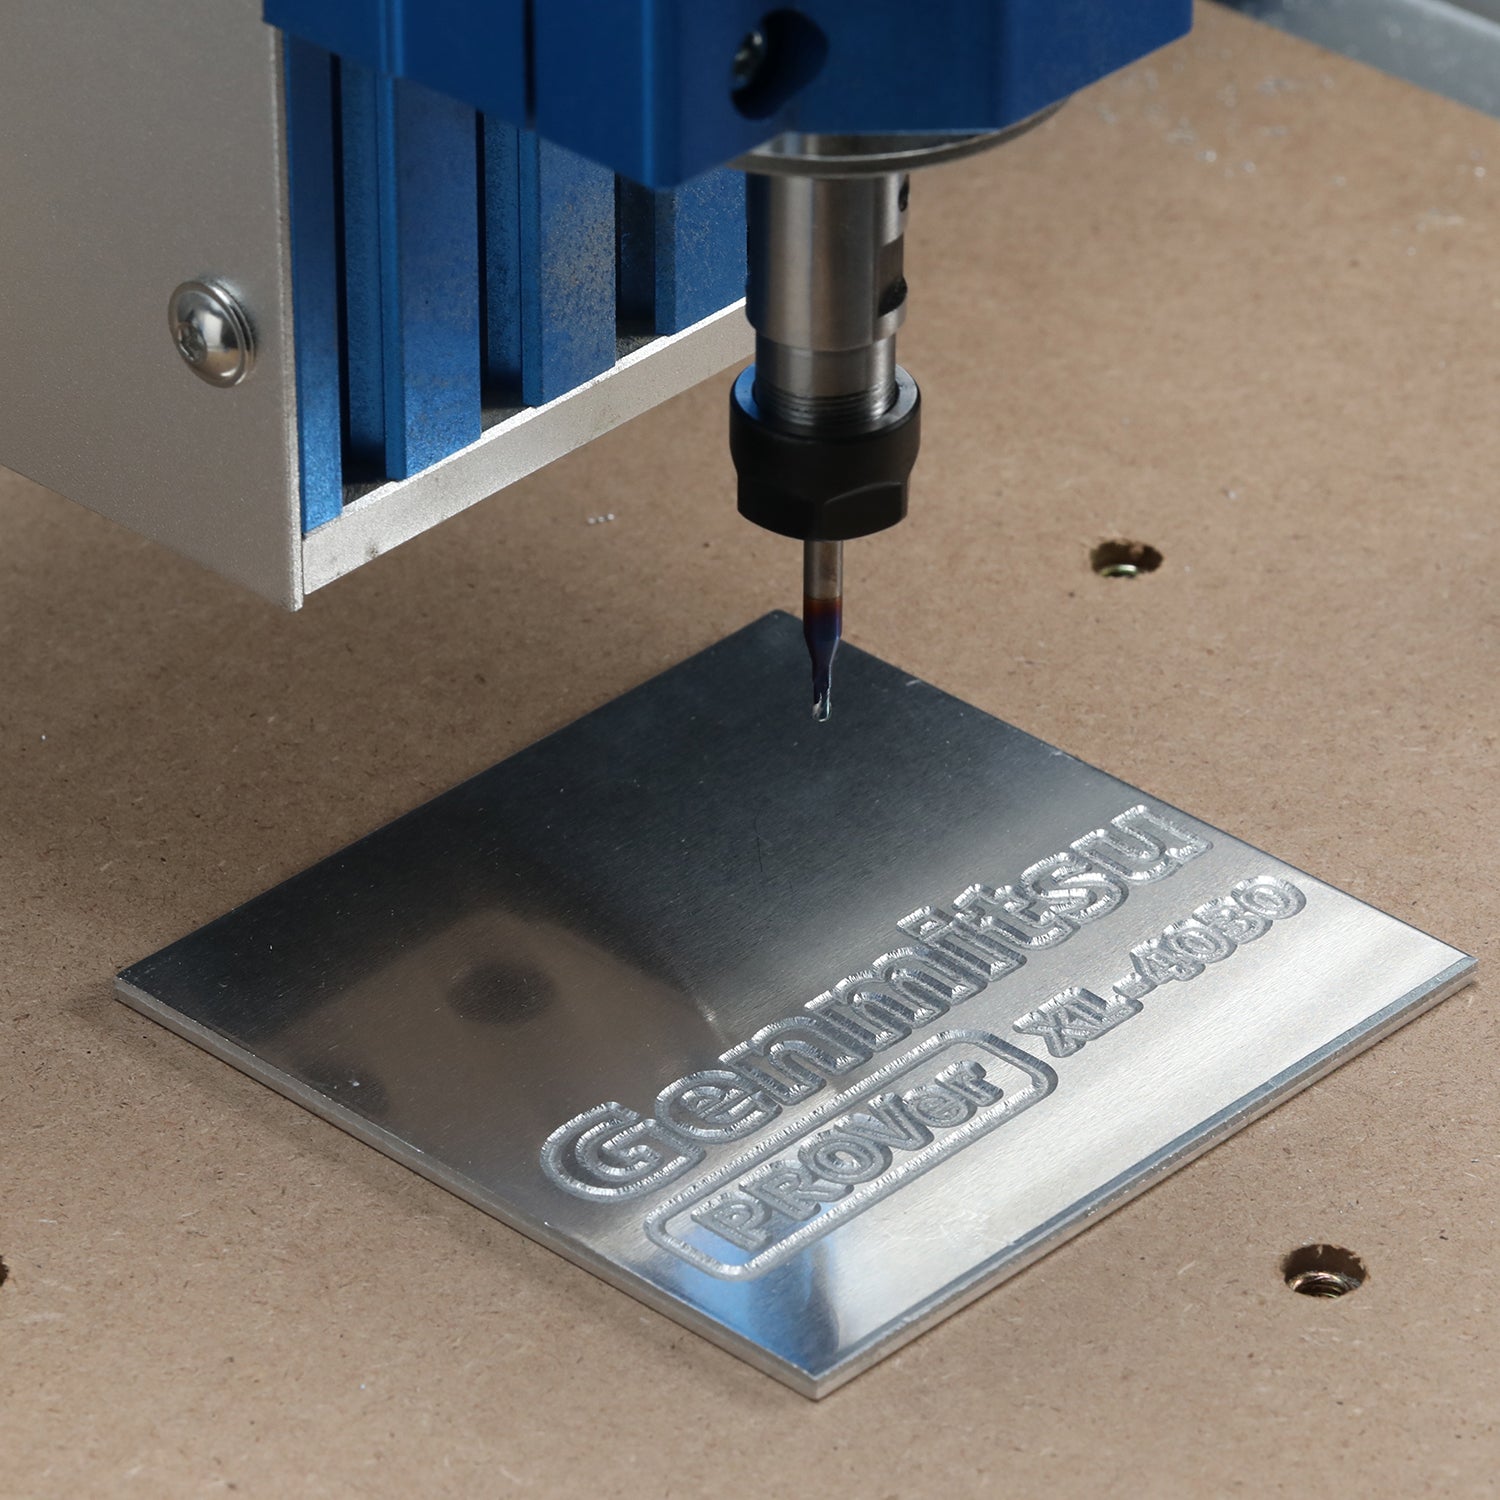
This has to be the main part of any review, it’s supposed to be rigid enough to cut soft metals so I am going to cut some soft metals! The difference in the power and rigidity needed to do this is due to the relative hardness of the stock. Metal is harder than wood, any deflections of the bit caused by the increased stress on the whole machine will be magnified, the forces needed to push a bit through metal are significantly higher than when cutting wood or plastics.
For my test I will be making this bracket, it’s fairly simple and will be cut out of a 300mm by 40mm by 3mm thick aluminium blank, it’s 60mm wide and has four 6mm diameter holes. (The blank was cheap, the exact grade of the alloy was not specified). There seem to be as many grades of Aluminium as there are types of wood! Also there the same variety of surface finishes are available, Satin, Extruded, cast, polished…. as there are for wood. Sawn, planed, Ply…. The same seems to be true for Brass, Copper etc.)
If you have read any of my guides then you might have noticed that while I would not consider myself tight or cheap, or anything remotely like that, I will admit that I can sometimes be careful with my money! As such I have bought offcuts. And the lowest bidder got the order! So the material I am using for my first attempts are just described as Aluminium, no further details are available to me, not that I would know what they meant at the moment. This does differ from Wood, I at least understand and base my purchases partly on the classifications of Softwood, Hardwood and Ply… at a minimum! (But the lowest bidder still probably got the order)).
Gold and silver are soft metals! Engraving and cutting those should be easy for this machine. If anyone has any offcuts they don’t have a use for I am quite willing to try it out, I will even pay any postage!
I need two brackets so there is a little leeway to experiment with speeds, feeds etc. the values I used and quote here are fairly conservative, I have not pushed the machine to its limits (yet) I haven’t needed to.
In the middle will be a flat, untouched bit of aluminium! While it has nothing to do with its function, I will engrave some text and engrave a frame around it. Three tests for the price of one!
Bits I am using
Nothing really to do with the 3020 PRO MAX but If you are cutting soft metals to get the best results you will need bits designed to cut soft metals. Mine came with a set of the EM03 Chromatic Coated V and 0.5mm ball nose bits (Please check any current offers before complaining that yours did not).
The specifications say they are a lot harder than the existing coated bits with an HRC (A Rockwell hardness test which in simplistic terms is pushing a sphere conical diamond [If you don’t know what sphere conical means look it up, and please
send me what you find out] into the surface at high pressure and measuring how far it goes in) of 92 as opposed to ~50 (nearly double) for other common bit coatings. Anyway, the higher numbers are harder and so should be more capable of metal cutting with an even surface finish with less bit wear.
| Image | Bit | Use | Description |
 |
30° V bit | Text Engraving | Chromatic coated, part of the EM03A set that came with the machine. |
| 0.5 mm Tapered Ball | Engraving the frame | Chromatic coated, part of the EM03A set that came with the machine. | |
 |
3mm Flat End | Cutting holes and cutting out from the blank |
Part of the SN07A set, 3 flute bits for Aluminium. 4mm Shank. |
 |
4mm ER11 Collet | Hold 4mmshank bits | Part of the ER 11 collet set. |
Cutting Metal
The only metal I have cut so far is Aluminium and mild steel on a 3018 PROVer. That would be a hole in the Bed and a groove through a Clamp! So please bear with me! I have never used chipload rates on the PRO or PROVer, just started slow at maximum revs, there is a danger in using slower speeds with the smaller 775 motor as it can stall and doesn’t have enough torque to work well with the slower speeds, it’s only 24V. But with a new and shiny 300W 12,000 RPM 48V motor on the 3020 PRO MAX they have a bit more relevance so I am going to use them to determine my initial speed/feed rates. After that I will go back to my basic trial and error method. However, chipload calculations seem to become meaningless at very small bit diameters like 0.1mm for a V bit and 0.5mm for the ballnose I am using so a bit of research on speeds and feeds is needed. I am sure someone has tried this before! For Aluminium and as far as I can see for Copper and Brass as well a good starting chipload is in the region of 0.025mm for small bits. I have included all the speeds, feeds, depths etc. I ended up with in the Cut details section at the end of this document in case they are of use to you.